The following content provides insights on the Settings features in JGID. Here you will get introduced with the menu from which you can access all customizable feaures of your company account – how to create and edit users, how to edit and update your company details, how to upload forms and create default e-mail and document texts.
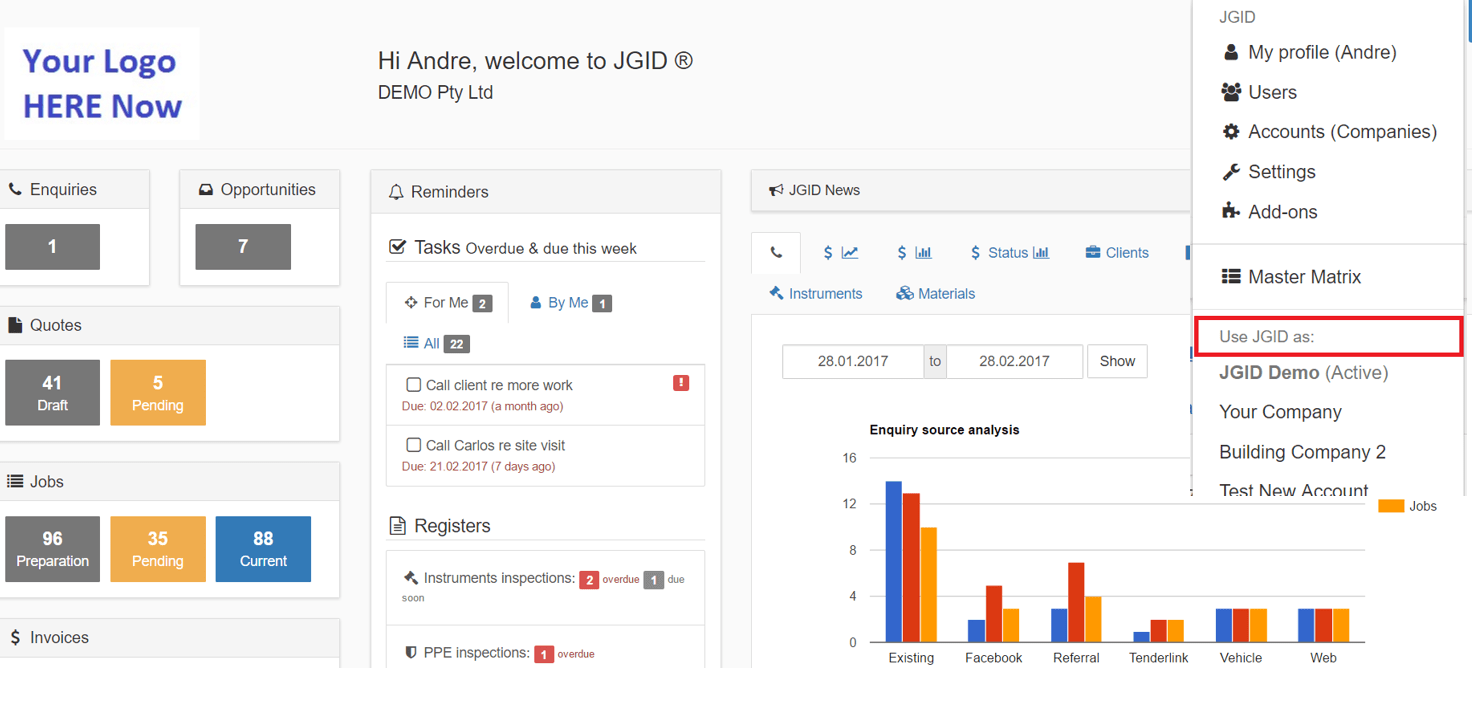
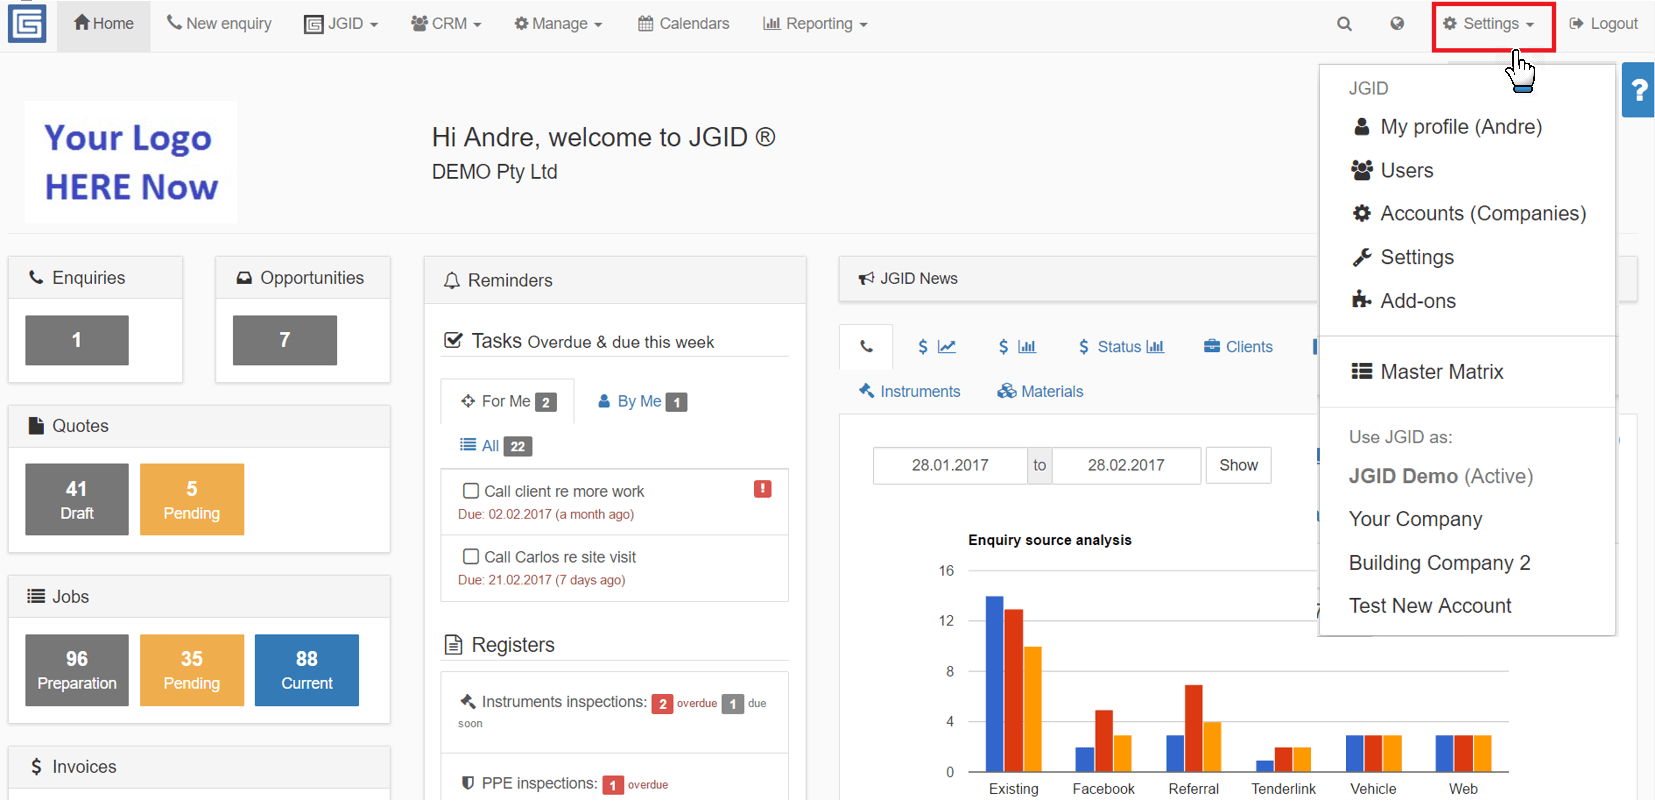
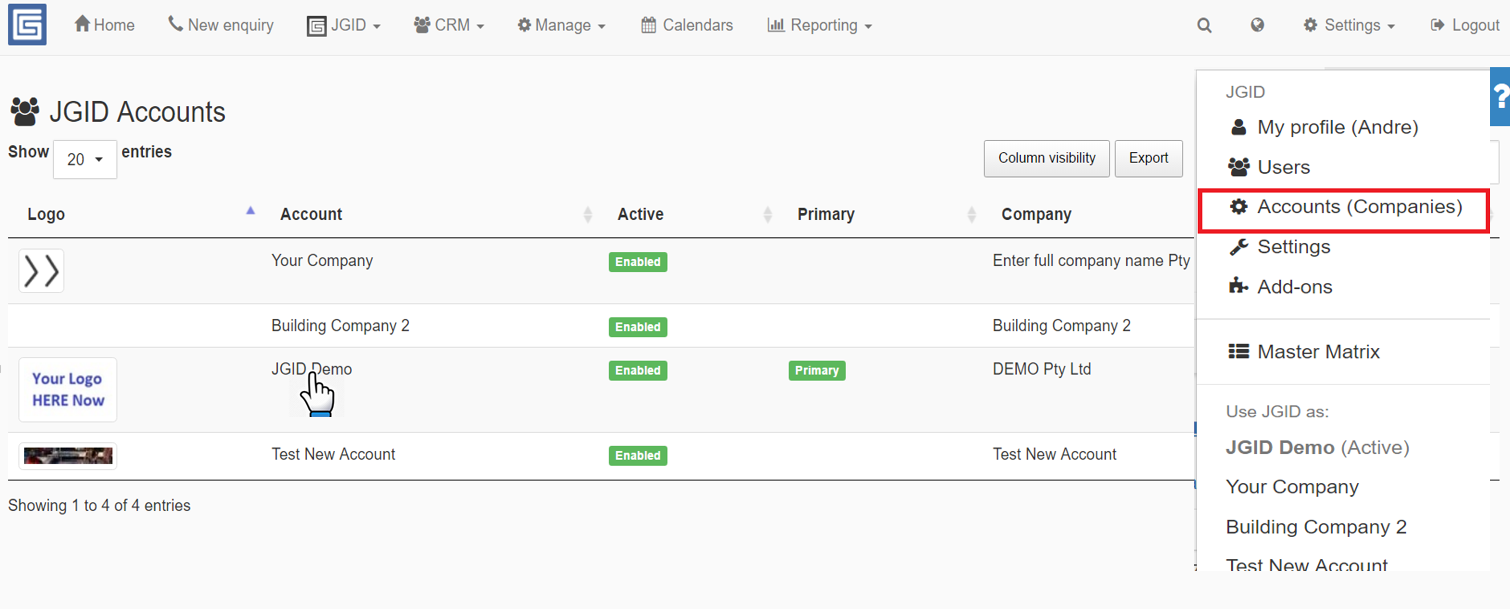
1. Click on the Settings button in the upper right corner of your JGID dashboard. Doing so will pull a drop-down menu delivering several essential options
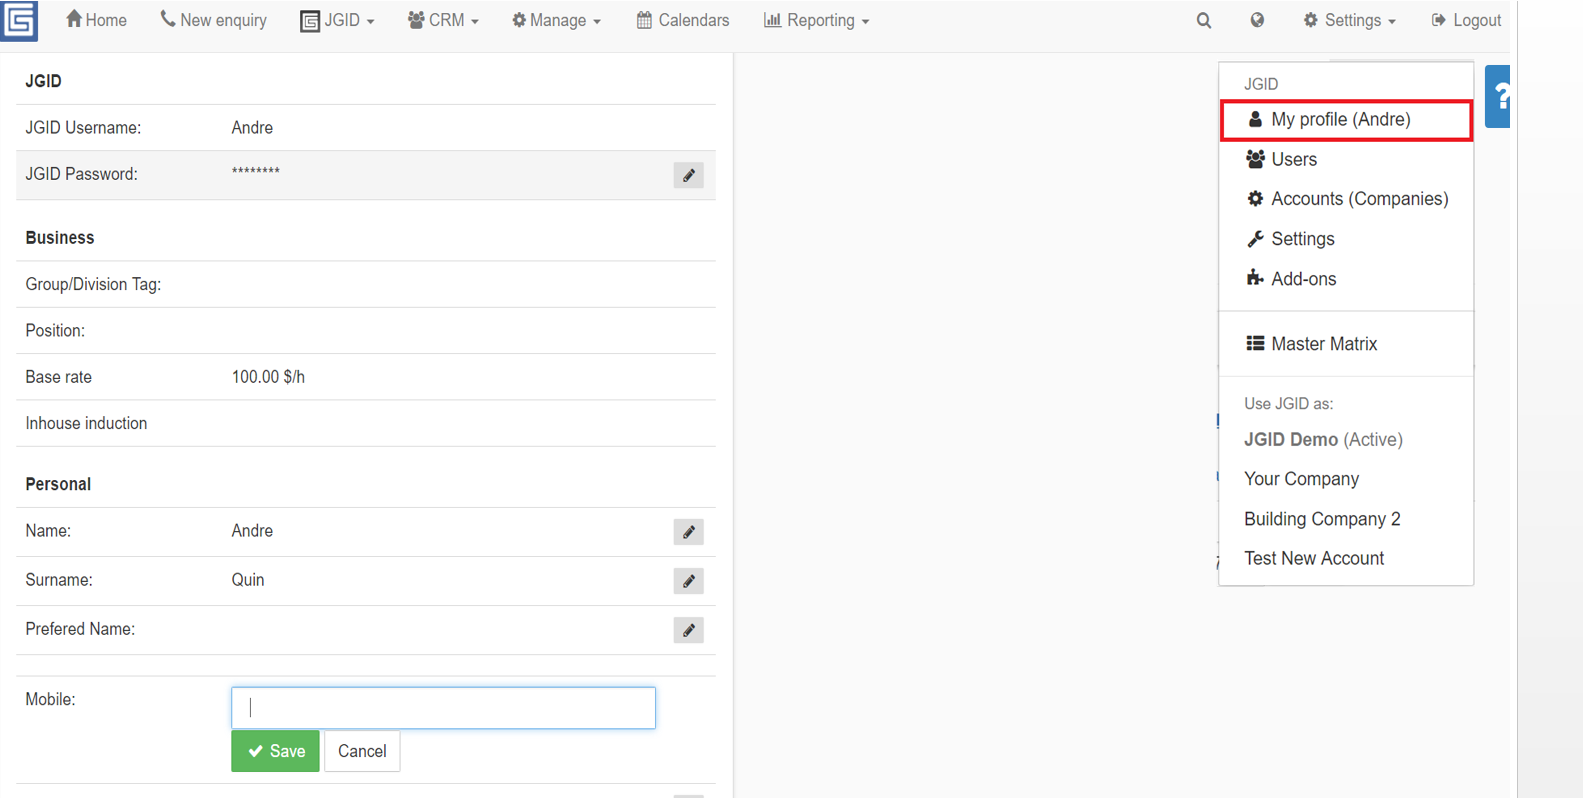
2. My Profile – Provides access to your account type details. From here you can change your password and any relevant personal information such as name, phone number, e-mail address, etc.
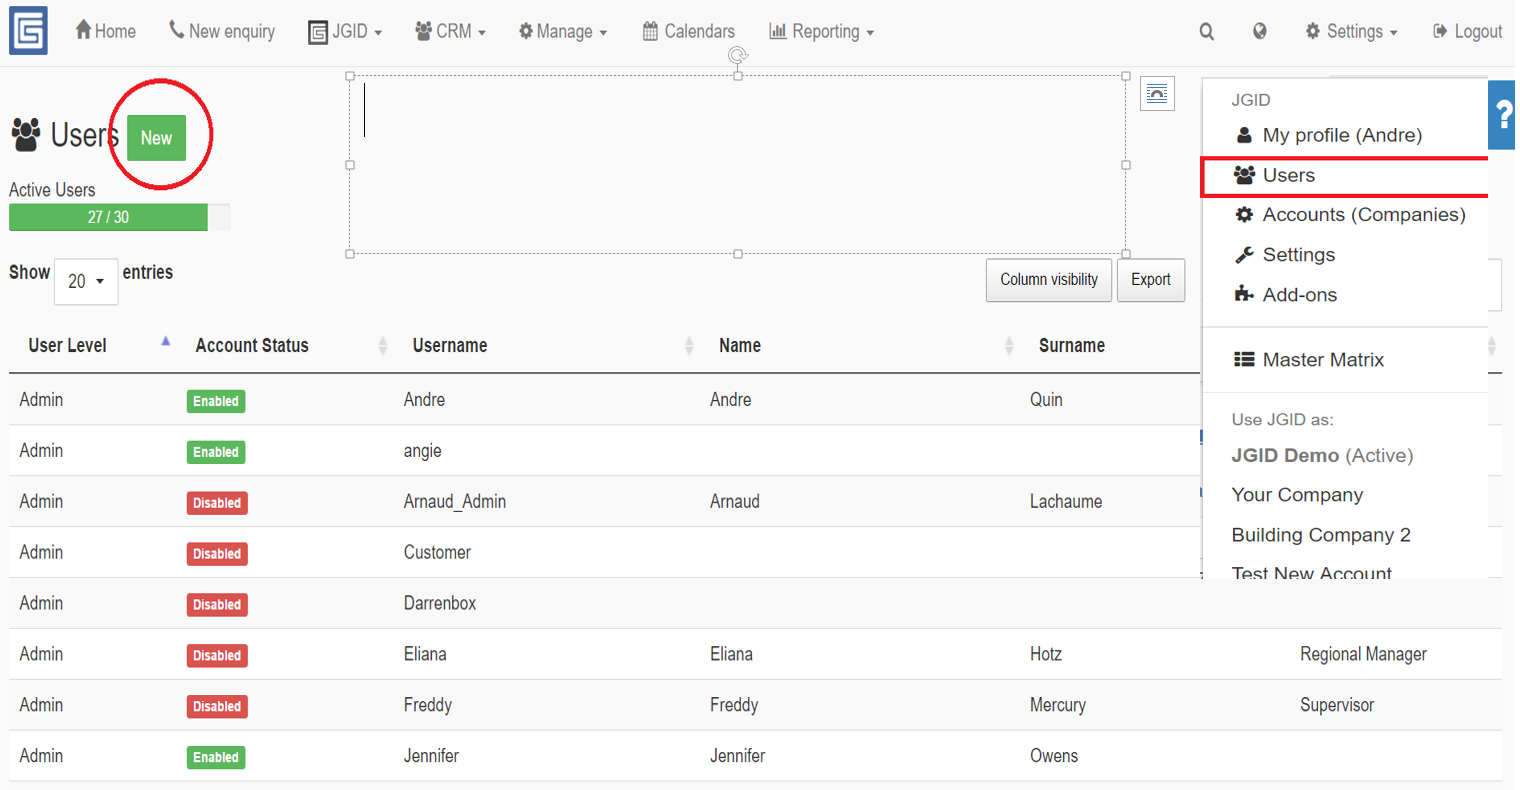
3. Users – Provides access to the New User creation menu. From here you can create users, edit user details such as password, usernames, relevant personal information. You can change the user account type or disable an enable the user accounts.
4. Accounts – Provides access to your company details.
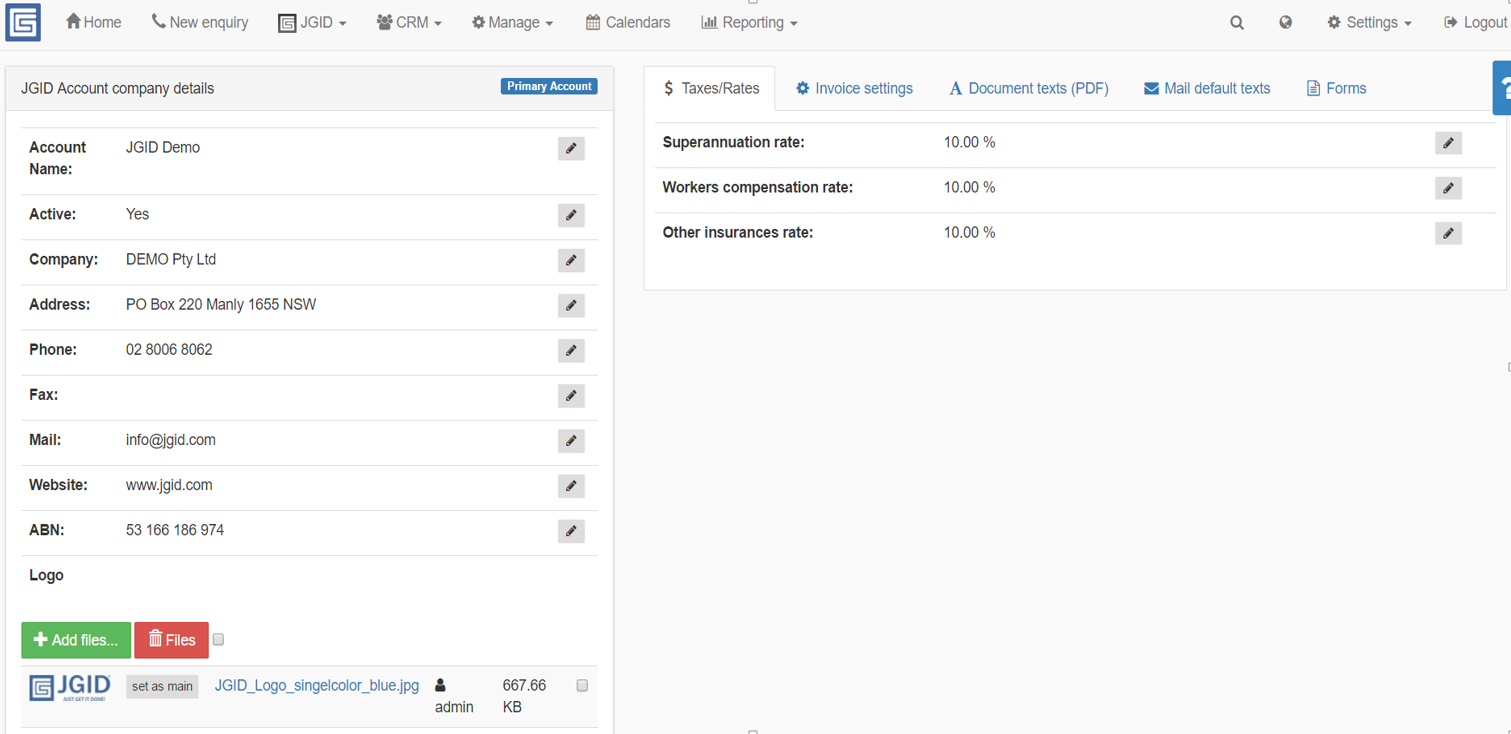
4.1. Accounts – Company details
From here you can edit all company related information such as full company name, e-mail, address, phone number, website, ABN, invoice settings, default mail and documents texts. You can have and operate with more than account.
5. Settings – Provides access to the Timesheets and Notifications panels.
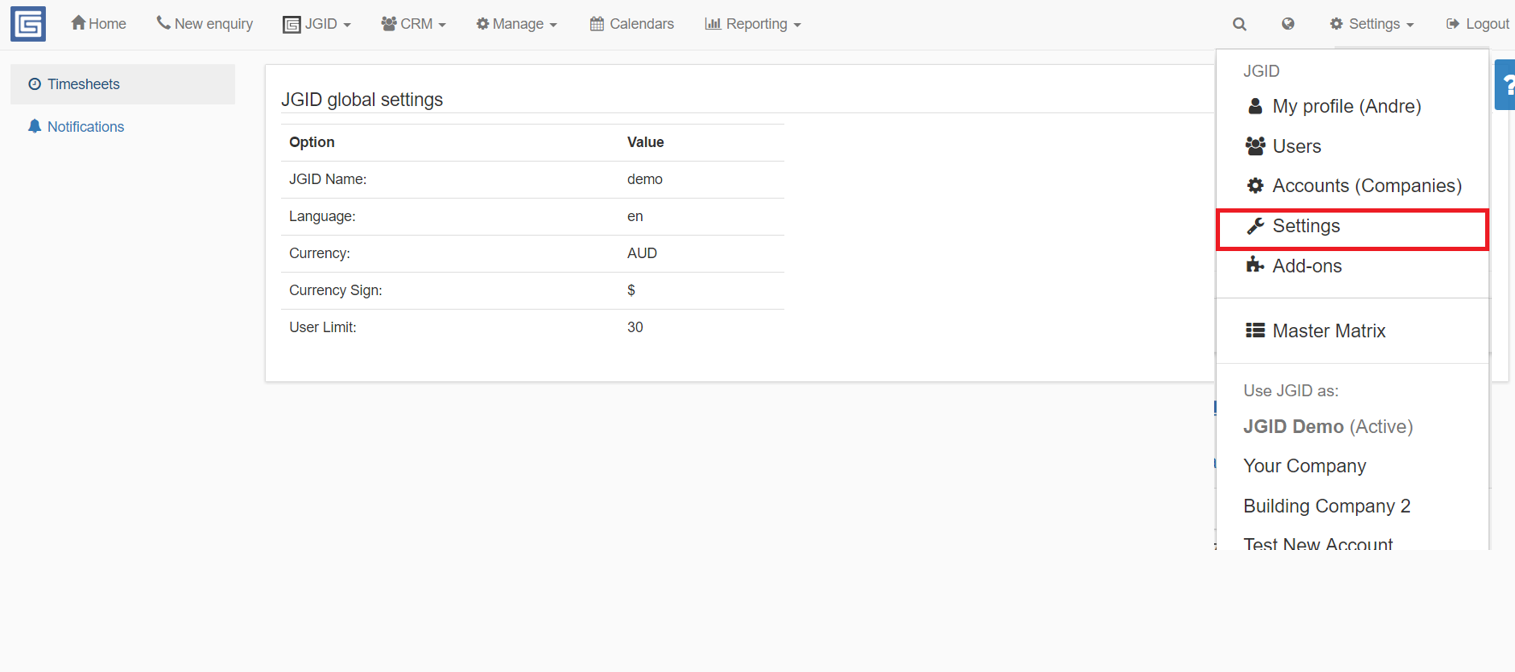
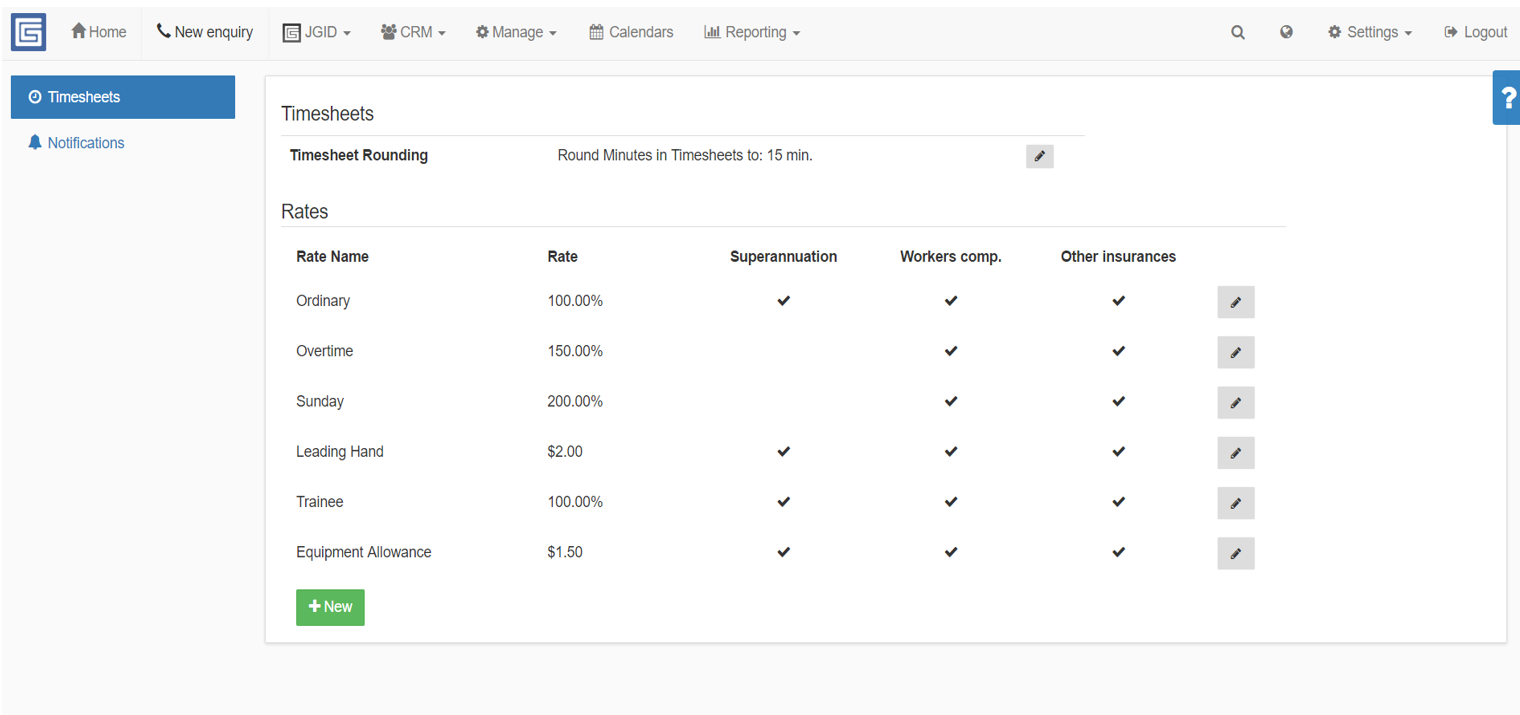
5.1 Settings/Timesheets – From the timesheets panel, the user can set and configure different pay rates and select global rules for all user accounts regarding applicable taxes and compensations.
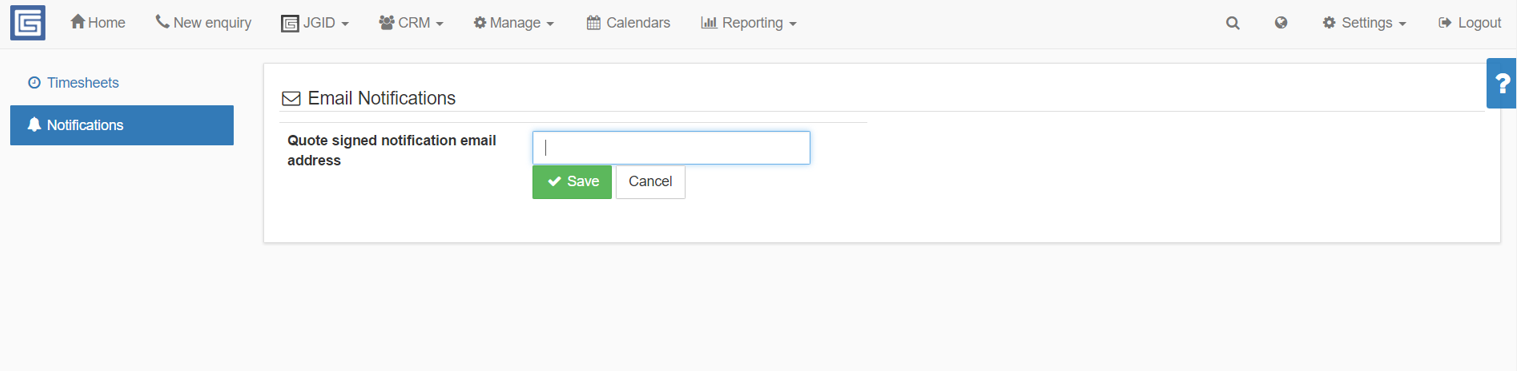
5.2. – Settings/Notifications – In this menu, the user can set the default Quote Approval notification e-mail.
6. Add-ons – Provides access to the Xero, Dropbox and Stripe API integration options.

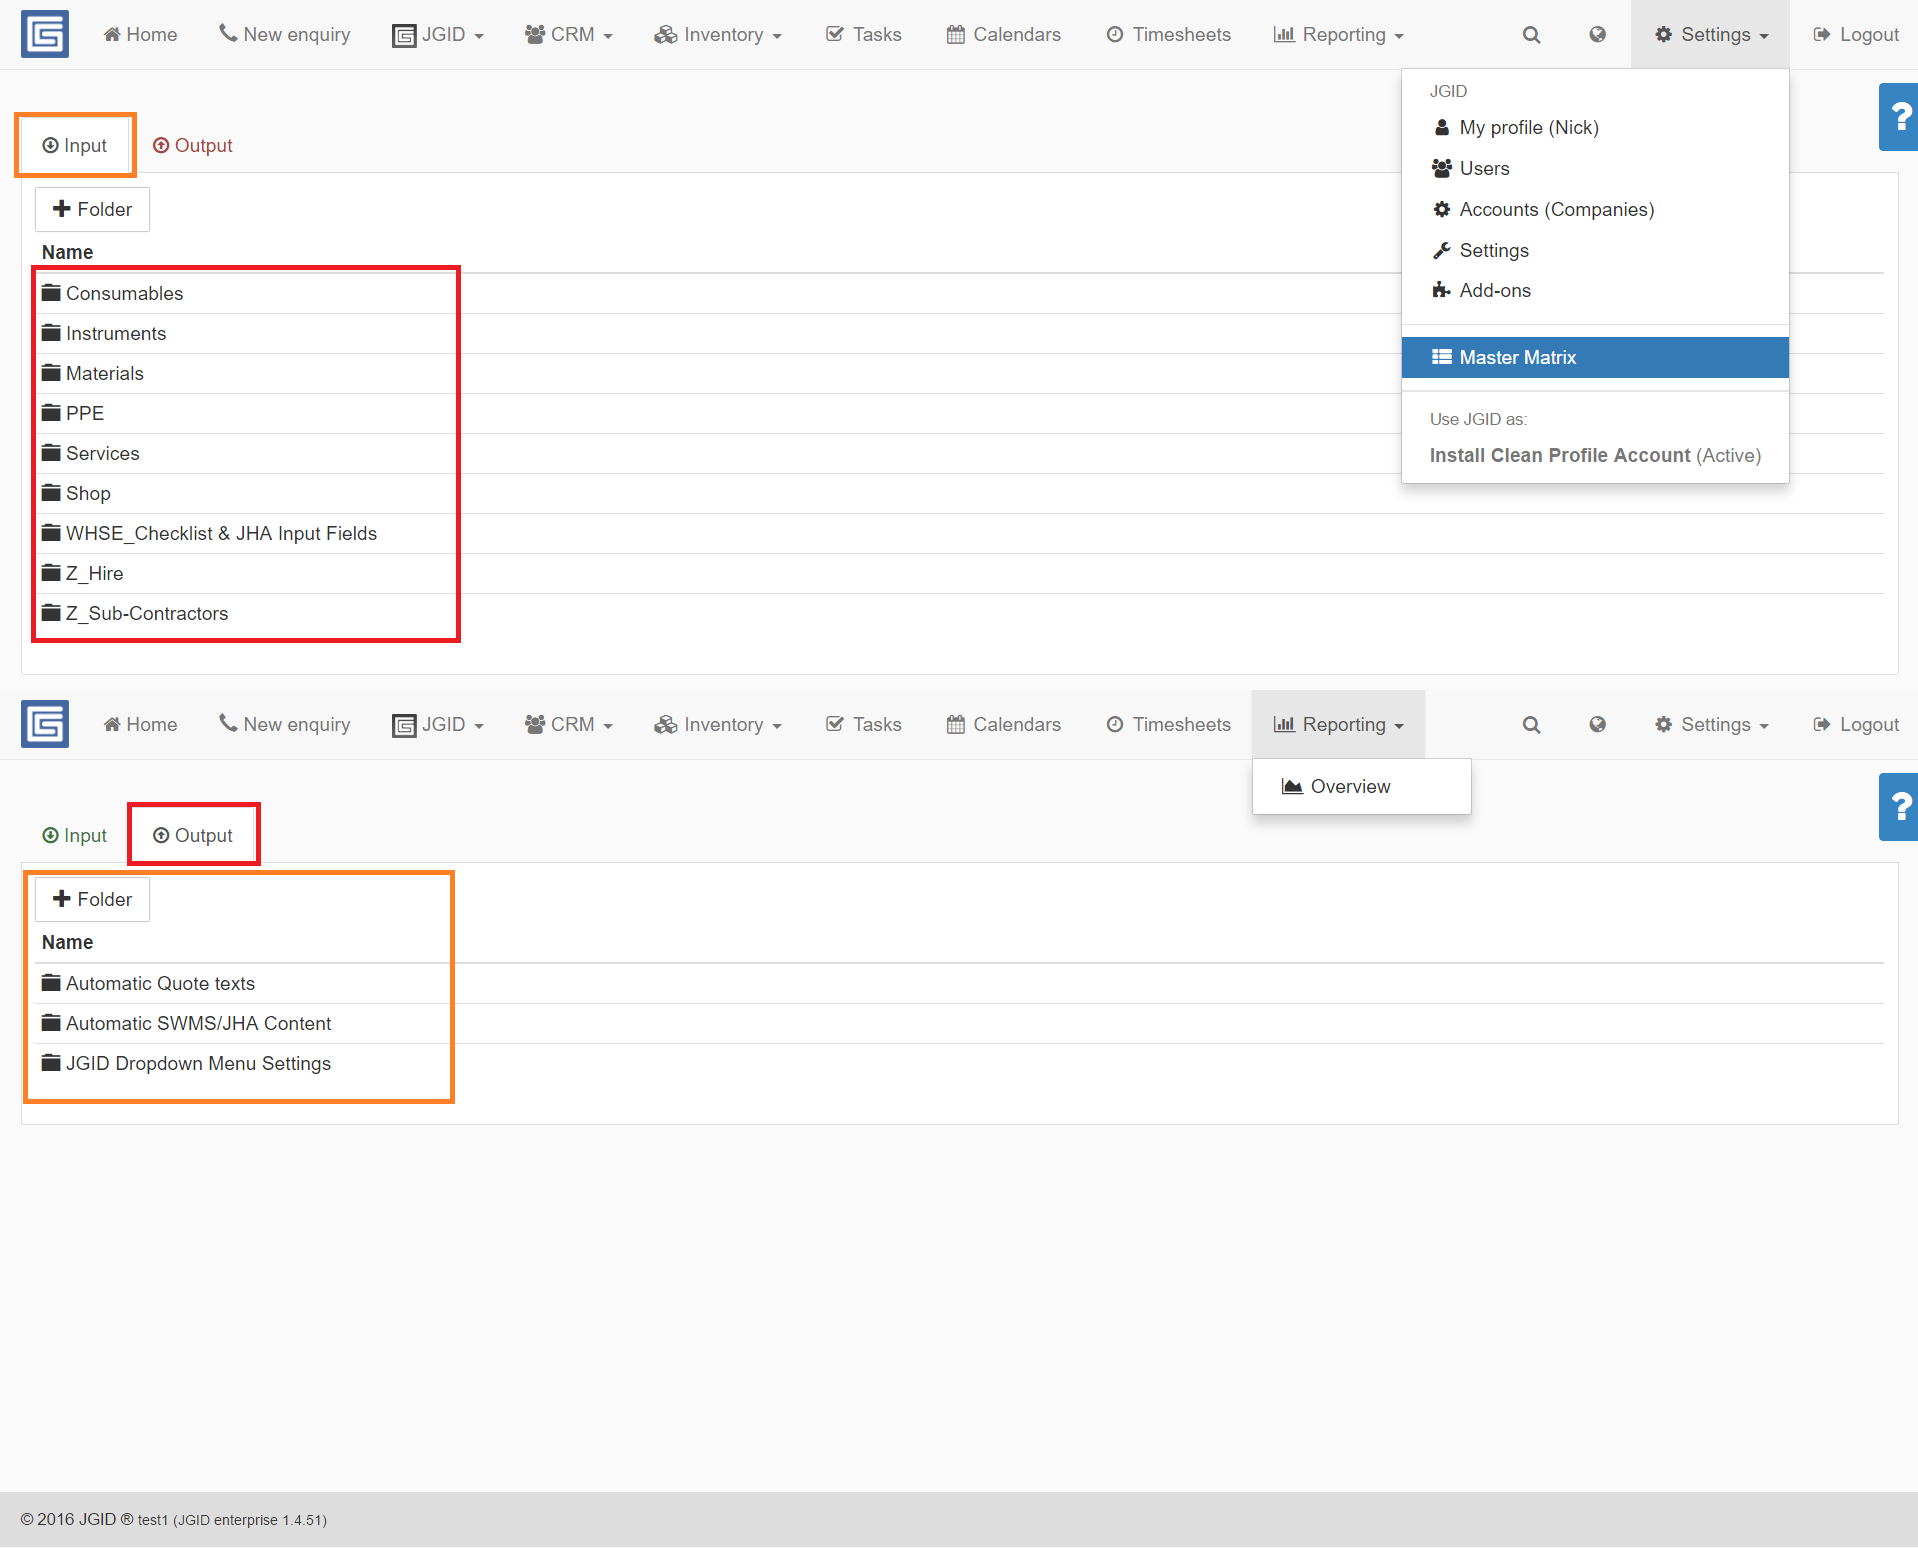
7. Master Matrix
The Master Matrix has two sections – Input and Output – in which the user is provided with the tools to create and customize a structure of Categories and Sub-categories needed to organize the services and products traded and managed in JGID.
It is also the place to create and automate the linking between different components and their relevant content such as clauses, “provided by”, employee qualifications and certifications as well as many others.
8. Use JGID as: – Since JGID allows the user to manage different company profiles under one account at this section you are informed on what is the current active account or company you are operating with and respectively managing.