
To place an Order in JGID would require the items of interest to have already been added to the respective Quote/Job as either individual, stand alone items or as sub-items in the structure of a Composed Item part of the Quote/Job.
Note that items can be added to an Order that then can be submitted to a Supplier only after the Quote has been approved and the respective Job has been generated. You can place Orders as soon as the Quote is transferred into the Prepartaion Job Stage!
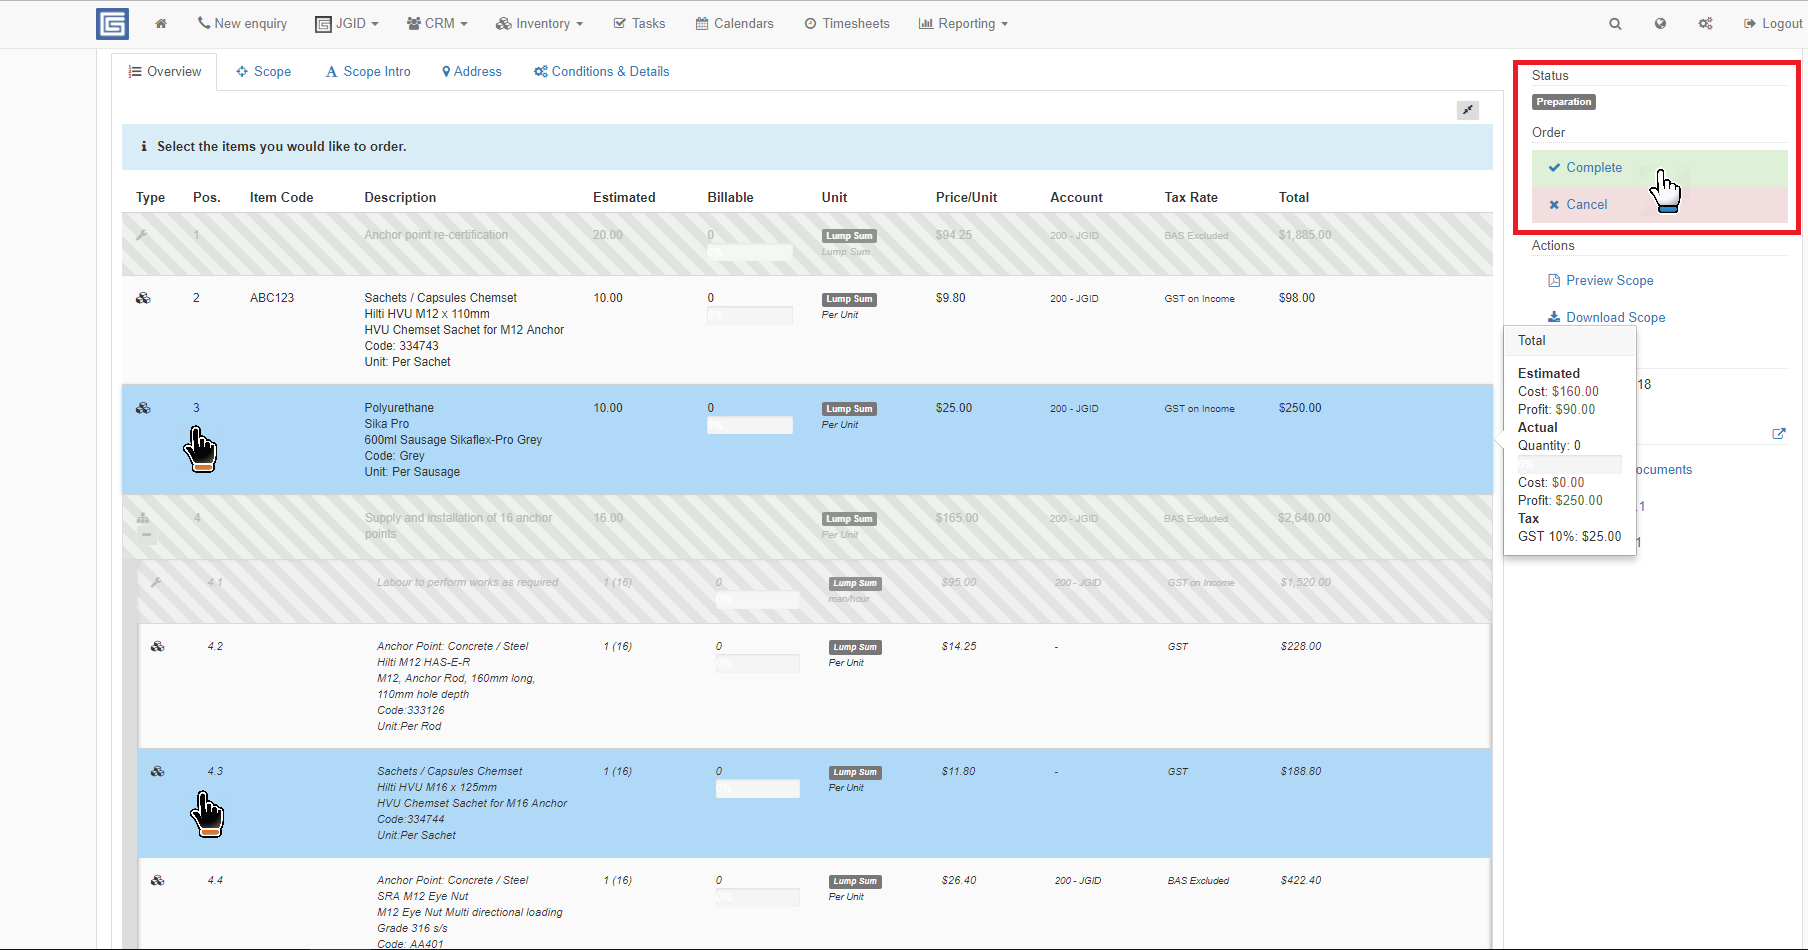
To generate the Order proceed with clicking on “Custom Order” button from the Management Column on the right side of the screen.

Select the items you would like to add to your order and click on the “Complete” button.
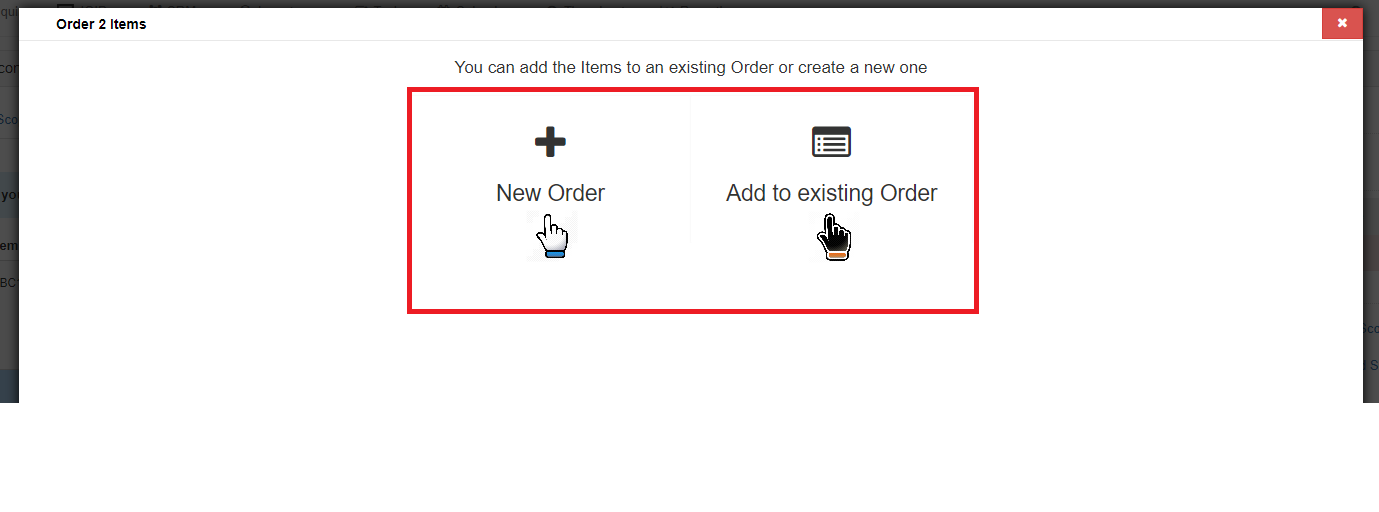
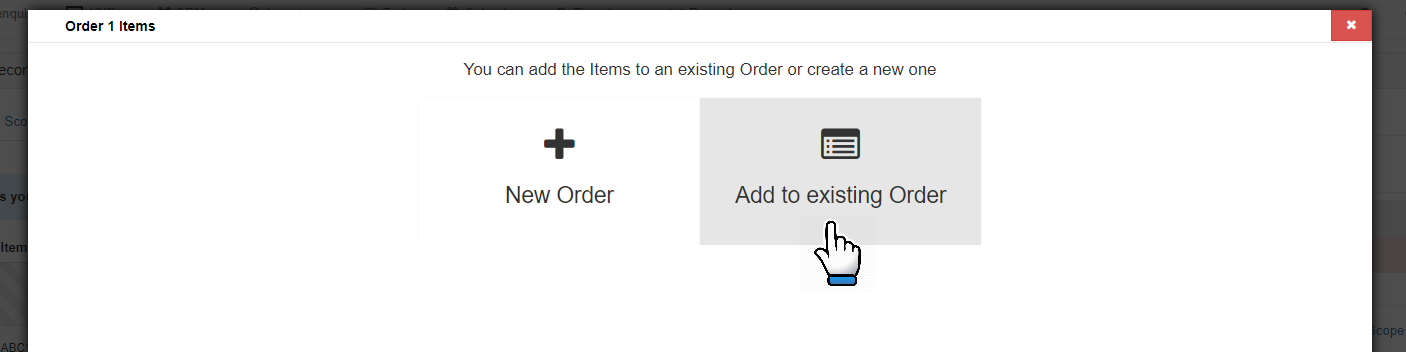
From the next screen choose if this is a brand new order or if you are going to update the content list of an exisiting one!
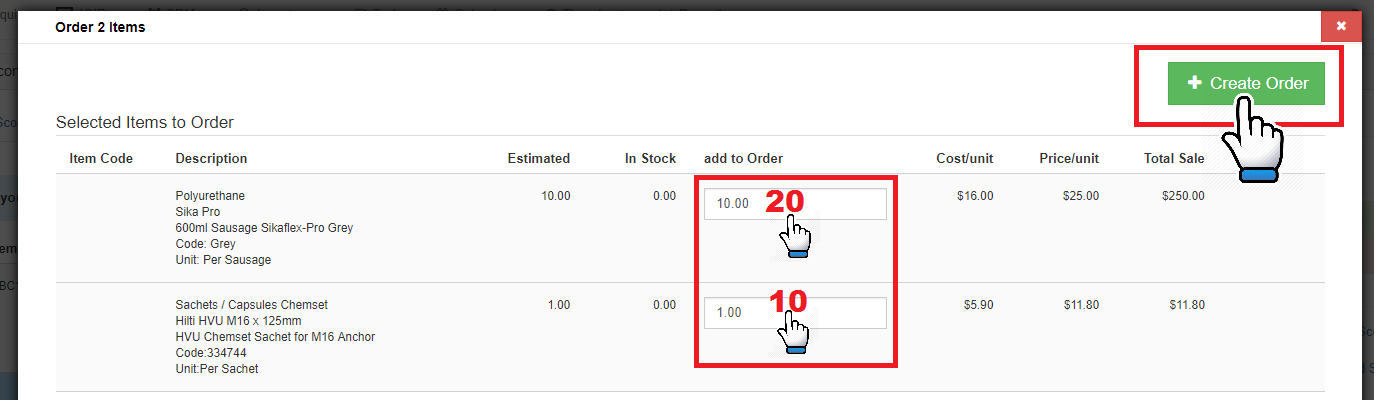
Proceed with specifying the quantities for the order by simply entering the values in the respective fields! After you have adjusted the quantities click on the green “+Create Order” button, in the upper right corner of the screen!
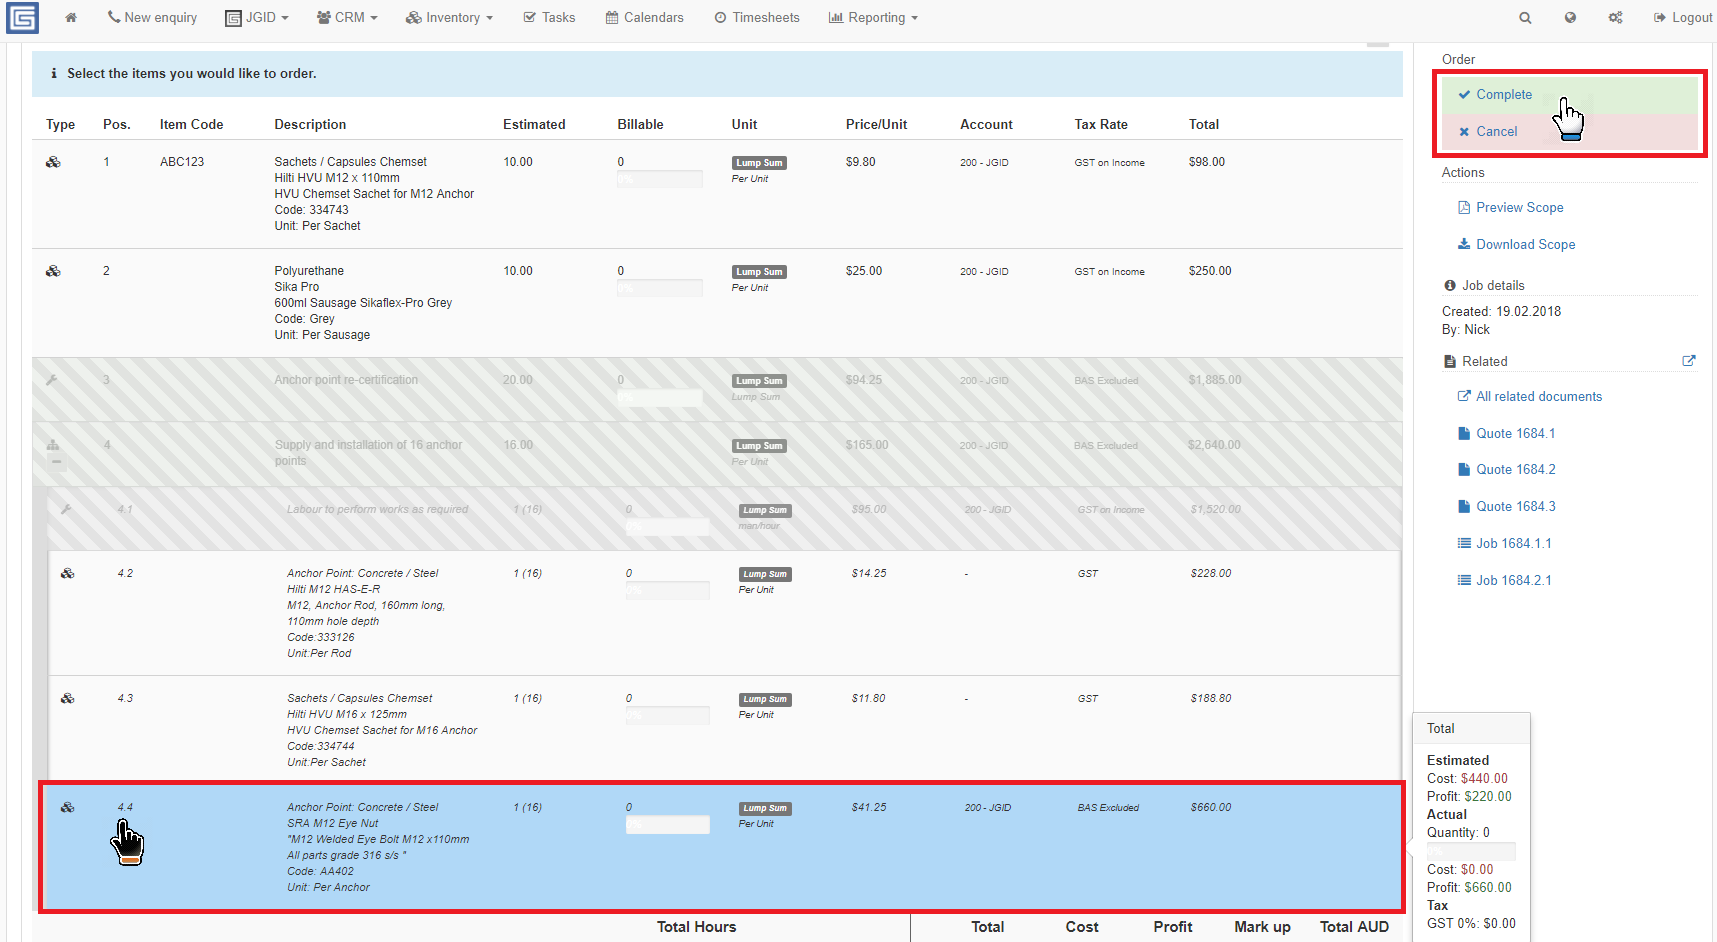
Note that you can add new items to an existing order later after you have added the new items to the Job or you can update the quantites for an existing order prior to sending it to the Supplier! To do so, click on the item you would like to have added to an existing order in the Job and repeat the above illustrated steps to add an item only this time instead of clicking on the “New Order” button, select “Add to Existing Order” option!!!
Next, select the order you would like updated from the list of Opened/Draft Orders
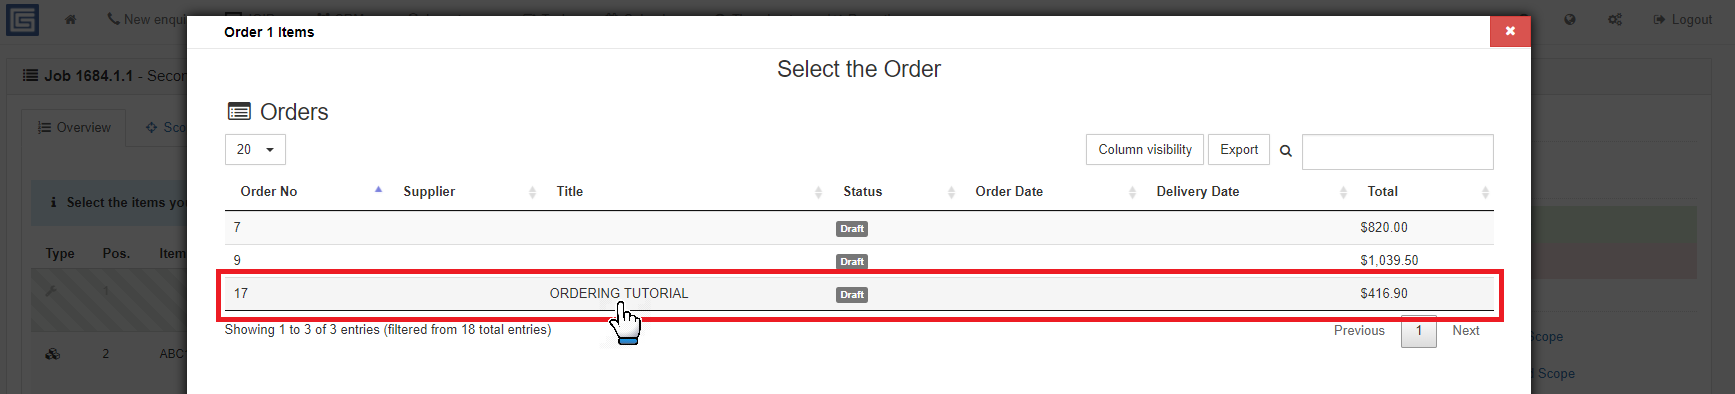
After you have selected the order, proceed with specifying the desired quantity and finalise by clicking on the “+Add Items to this Order” button! Bear in mind that if you have selected by chance the wrong order, you can switch to another one via the dedicated “Choose Different Order” button, deployed in the upper left corner of the screen!

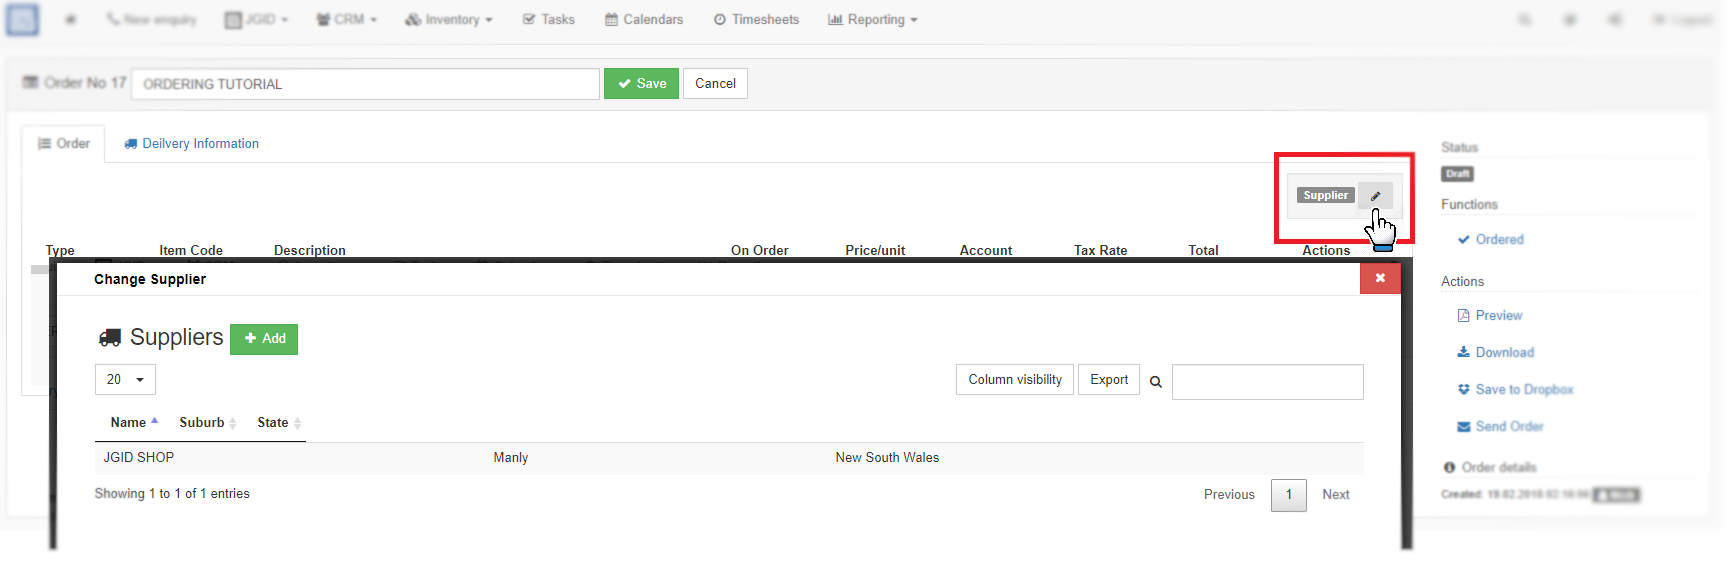
After the order has been itemised and the quantities determined, select your Supplier of Choice from the “Supplier” button, located in the upper right corner of the Order Overview Panel by clicking on the “pen” icon! You can either pick an existing Supplier or enter the details of a brand new one from the same panel by clicking on the green “Add” button!
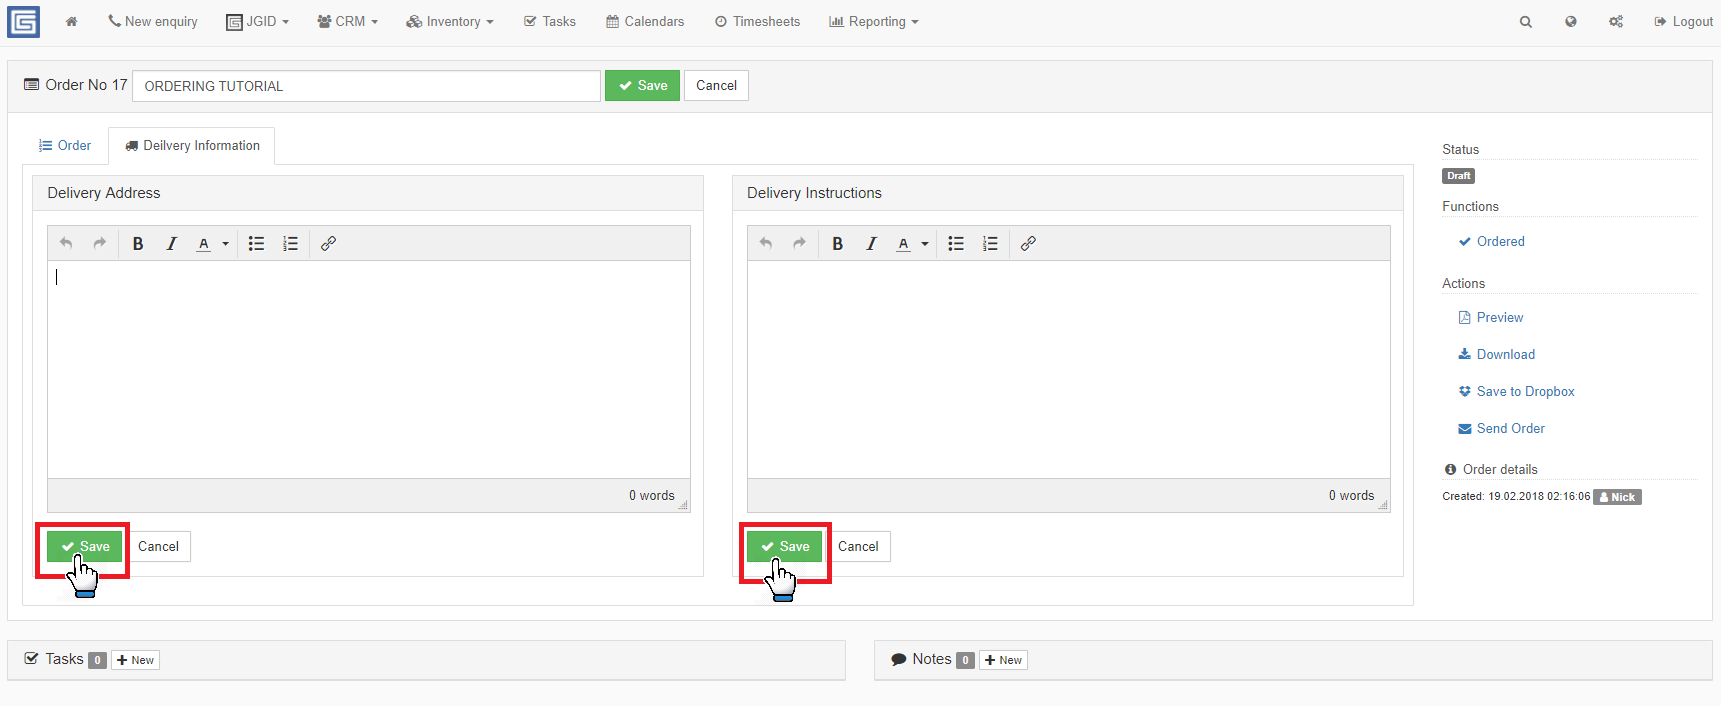
Next, switch to the Delivery tab to customise the Delivery Address for this order and to provide any special delivery instructions should such be needed!
Once you have completely populated your Order, it should be ready to be sent to the Supplier for follow up and delivery. You can process the order in the same manner you are processing the Quotes in JGID. The same set of Action Buttons are available in the Management Colum on the right side of the Screen that would allow you to Send the Order, Save it to DropBox, Preview or simply Download a PDF copy onto your local device’s storage media!

Once you get confirmation by the Supplier that your Order has been received and processed you can mark it is Ordered from the Status section located at its usual place at the top of the Management Column on the right sie of the screen! Next, when you receive the Supplier’s confiramtion that the Order has been shipped you can change the Status by clicking on the Shipped button and finally once the Order is delivered you can change its Status to Received to update the information in JGID!
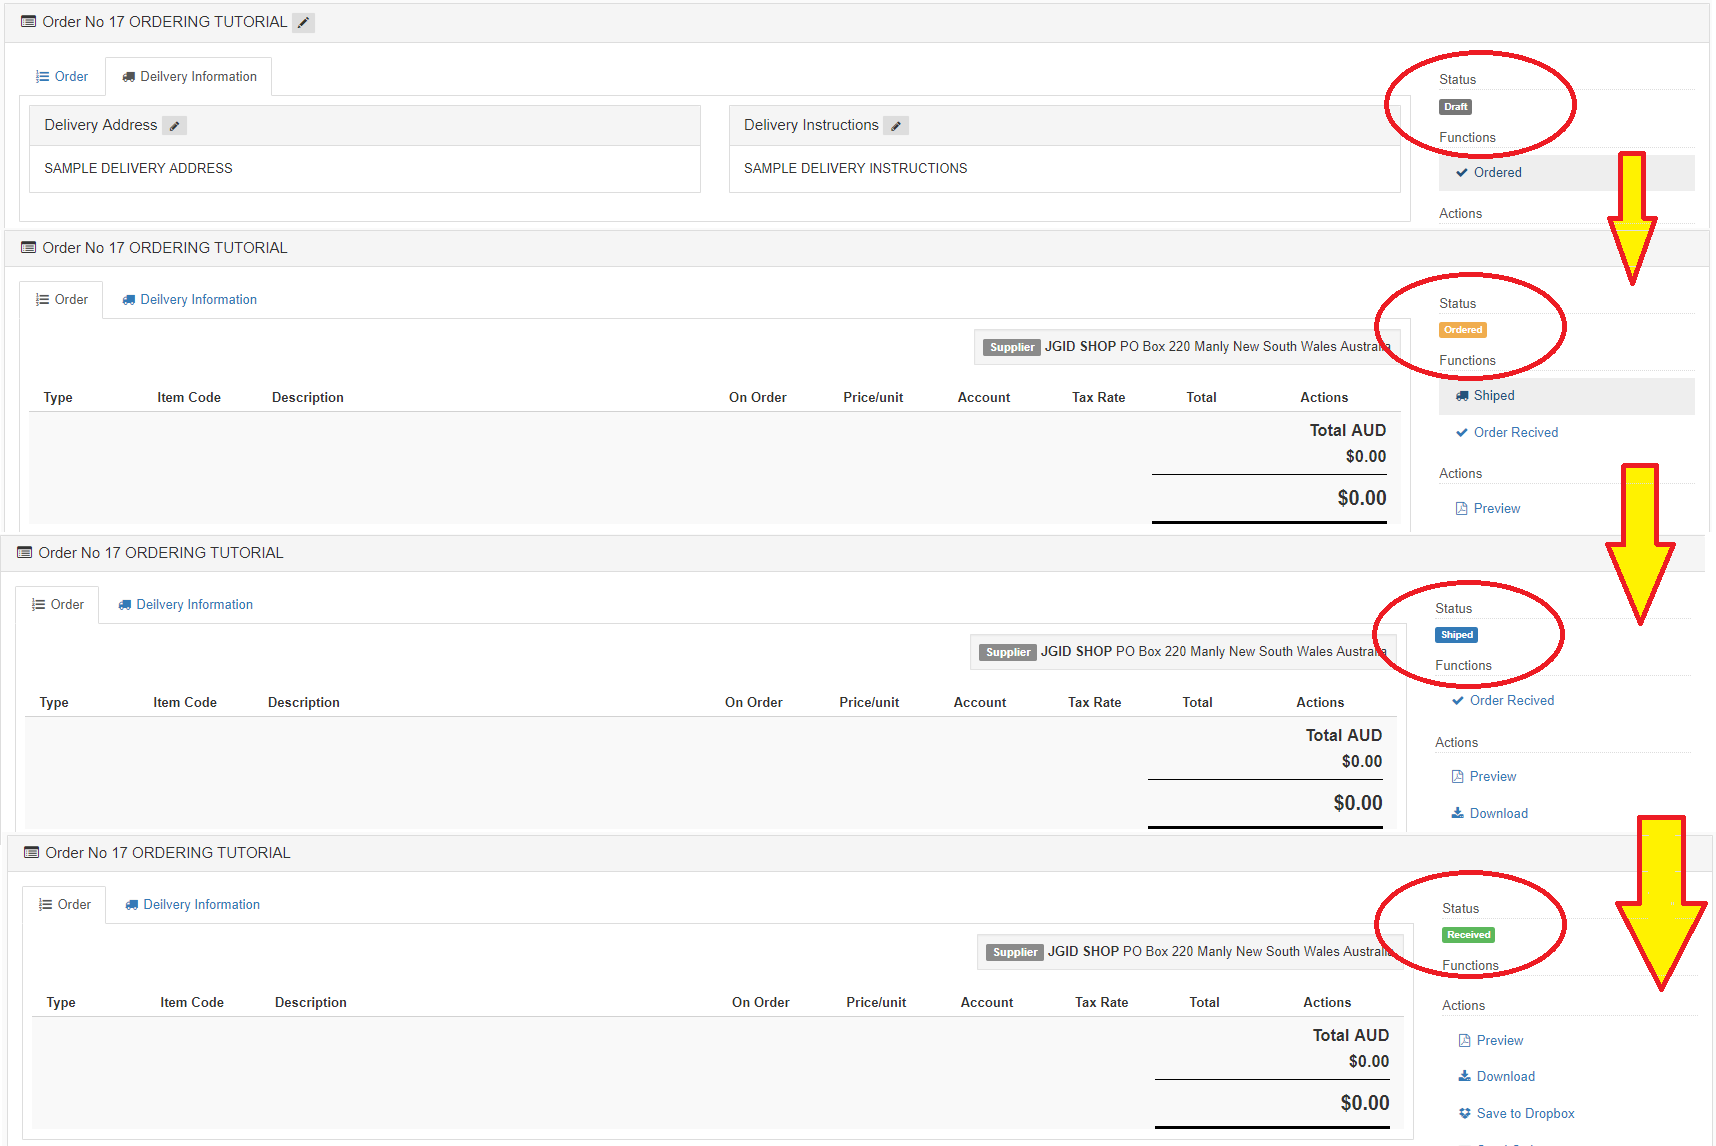
Note, that by marking an order as Received, JGID will automatically update the Stock Quantities in the Inventory, provided Stock Tracking has been activated for the items in question! More on Stock Tracking – HERE!
VIDEO TUTORIAL ON PLACING ORDERS IN JGID: